How it Works?
Linker is user-friendly thanks to its clear and simple interface, but a quick guide to the application will further demonstrate just how easy and convenient it is to interact with the interface

How to create a New Workspace?
Upon registering for Linker, users will have immediate access to a default workspace, ready for their use. However, for those looking for a more personalized experience, Linker also offers the flexibility to create additional workspaces. This allows users to effectively organize their items to suit their specific needs, ensuring that their bookmarks are always easily accessible and well-organized.
Creating a new workspace is very simple:
-
Step 1:
Click on the “New Workspace” button located in the sidebar
-
Step 2:
In the window that opens, set the image (optional) and type the name of the new workspace
-
Step 3:
After you have successfully set the image and entered a name, click on the “Save” button
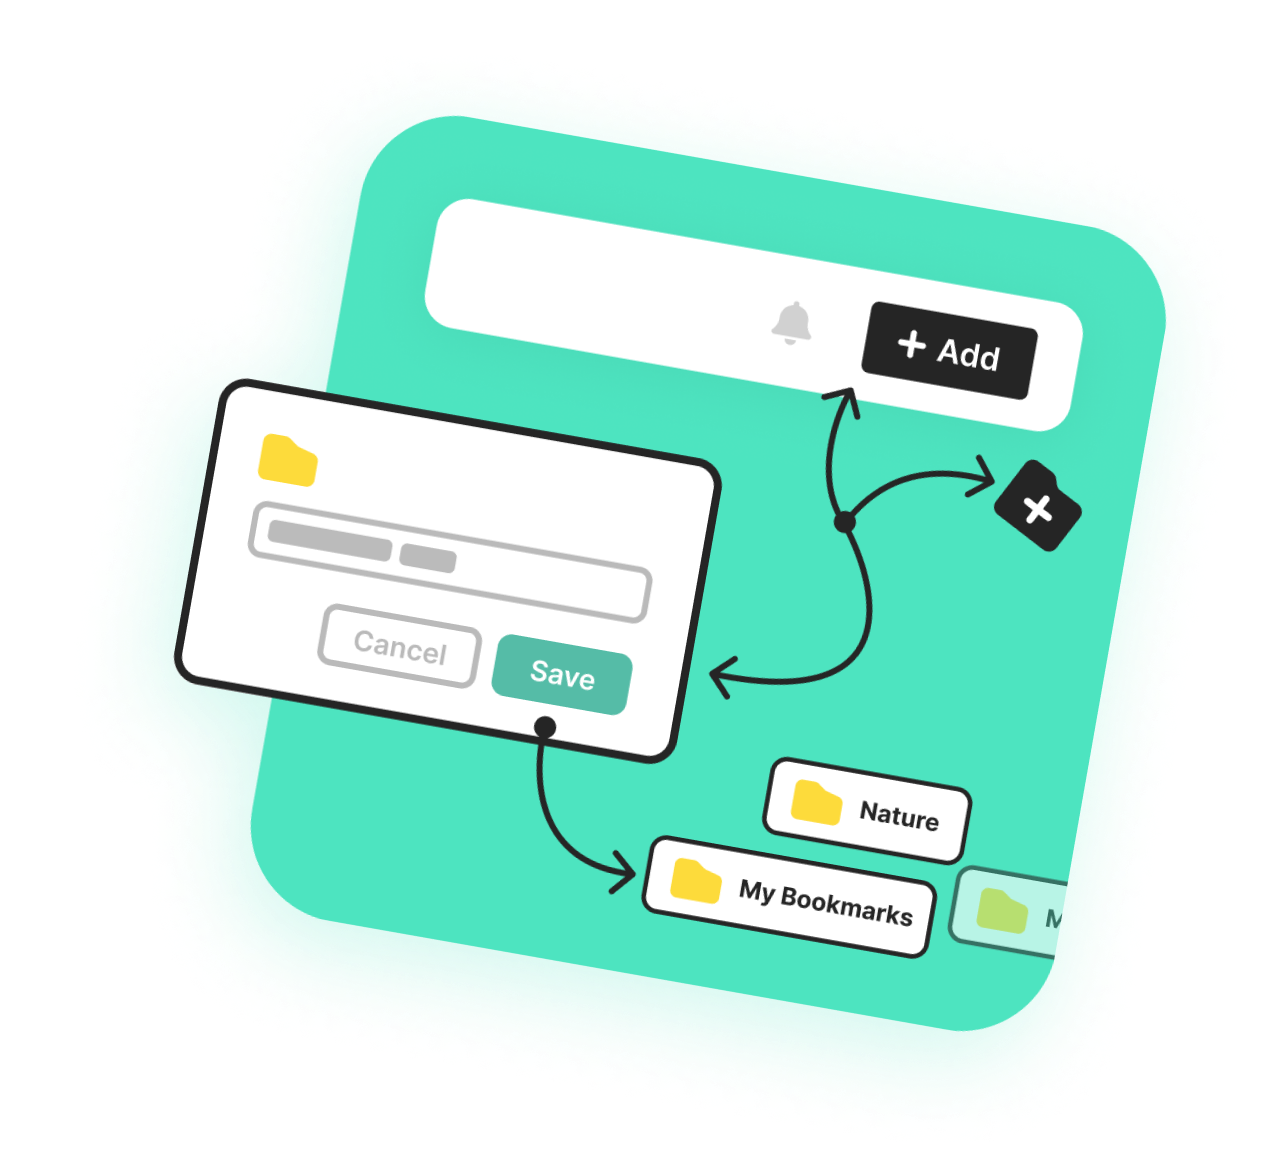
How to create Folders & Sub-folders?
After creating a new workspace, the next step in organizing your bookmarks more efficiently is to create folders. Users can create an unlimited number of folders, as well as subfolders. Creating a new folder is just as easy.
It only takes three easy steps:
-
Step 1:
Click the "Add" button located on the top bar
-
Step 2:
In the window that opens, enter the name of the new folder
-
Step 3:
After you have successfully entered a name, click on the “Save” button
The modal window for creating a folder can also be quickly opened using a shortcuts:
-
 +
+
 +
+

keys for MacOS users.
-
 +
+
+
+
keys for Windows users.

How to add Bookmarks?
Adding a new bookmark is actually easier than you might think. The process is similar to creating folders, with just a few minor differences:
-
First:
After inserting the link into the input, the window will show you a preview of what the new bookmark will look like in the dashboard (you will no longer be required to manually enter a name for the bookmark)
-
Second:
In the modal window for adding bookmarks, you will have the option to insert tags on the bookmarks, which will allow you to organize your bookmarks. And also tags are very useful when searching
The modal window for creating a bookmark can also be quickly opened using a shortcuts:
-
+

keys for MacOS users.
-
+
keys for Windows users.
Share with other users, create reminders and trackers for your bookmarks
In Linker, you can not only organize workspaces, folders, and bookmarks as you like, but also share them with other users, create reminders, and track changes in the bookmark source
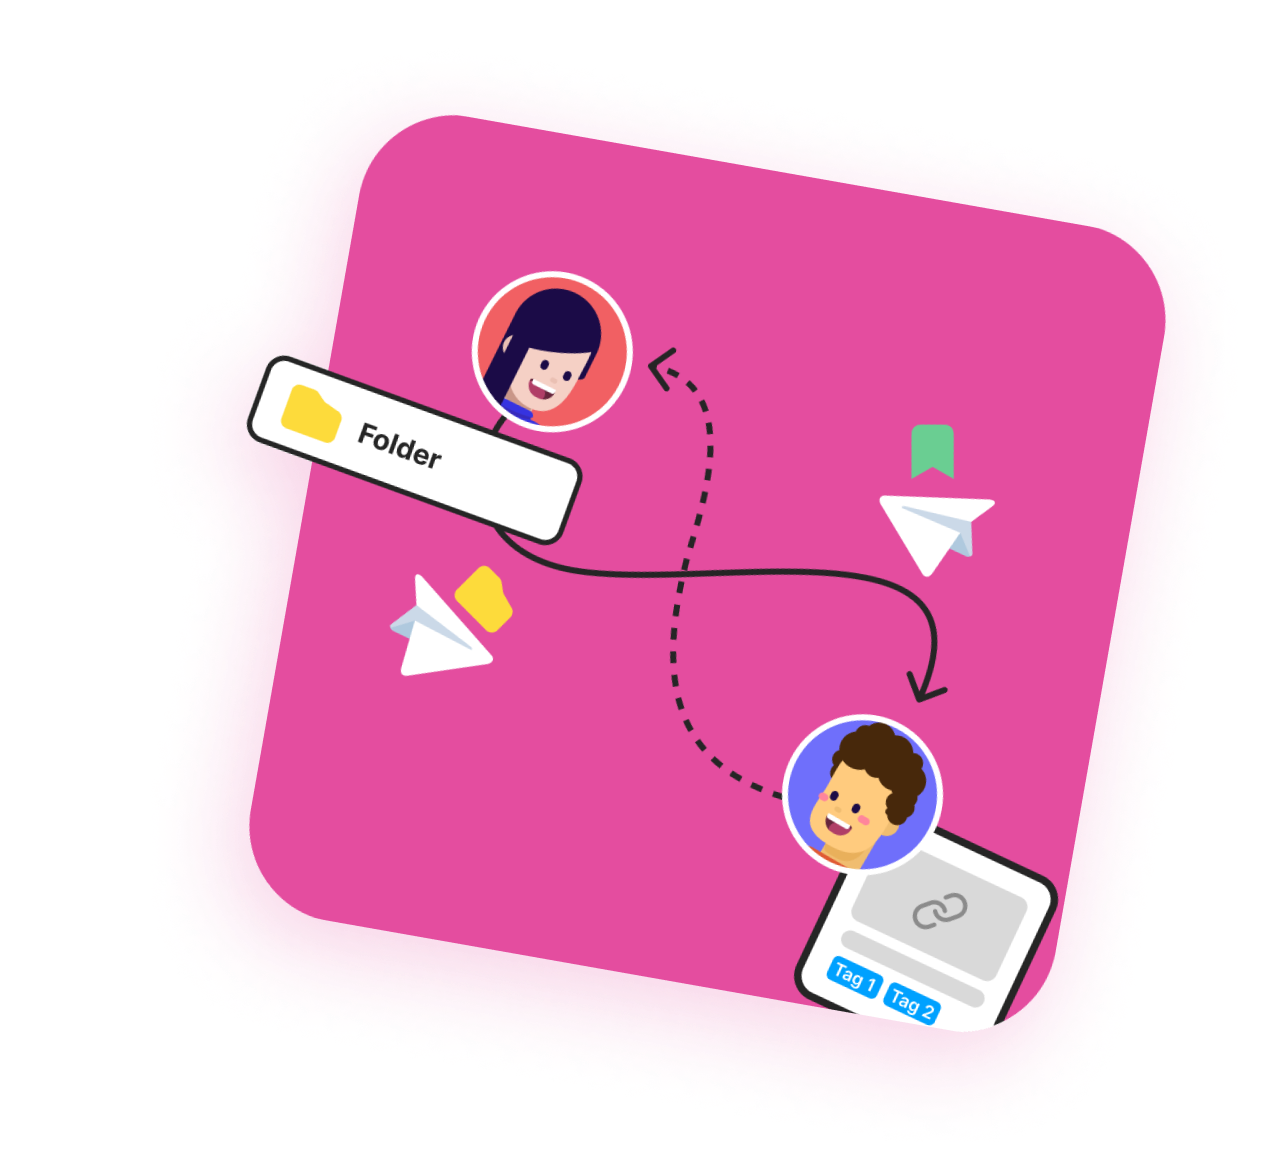
How to share Folders & Bookmarks?
You can share your bookmarks and folders with other users, giving them access to your personal items. The process of sharing bookmarks and folders is simple and doesn't take much time.
Share folder:
-
Step 1:
Hover your mouse over a folder and click on the “Menu”
-
Step 2:
In the window that opens, enter the email of the user with whom you want to share, and then press the "Enter" button to give them access
-
Step 3:
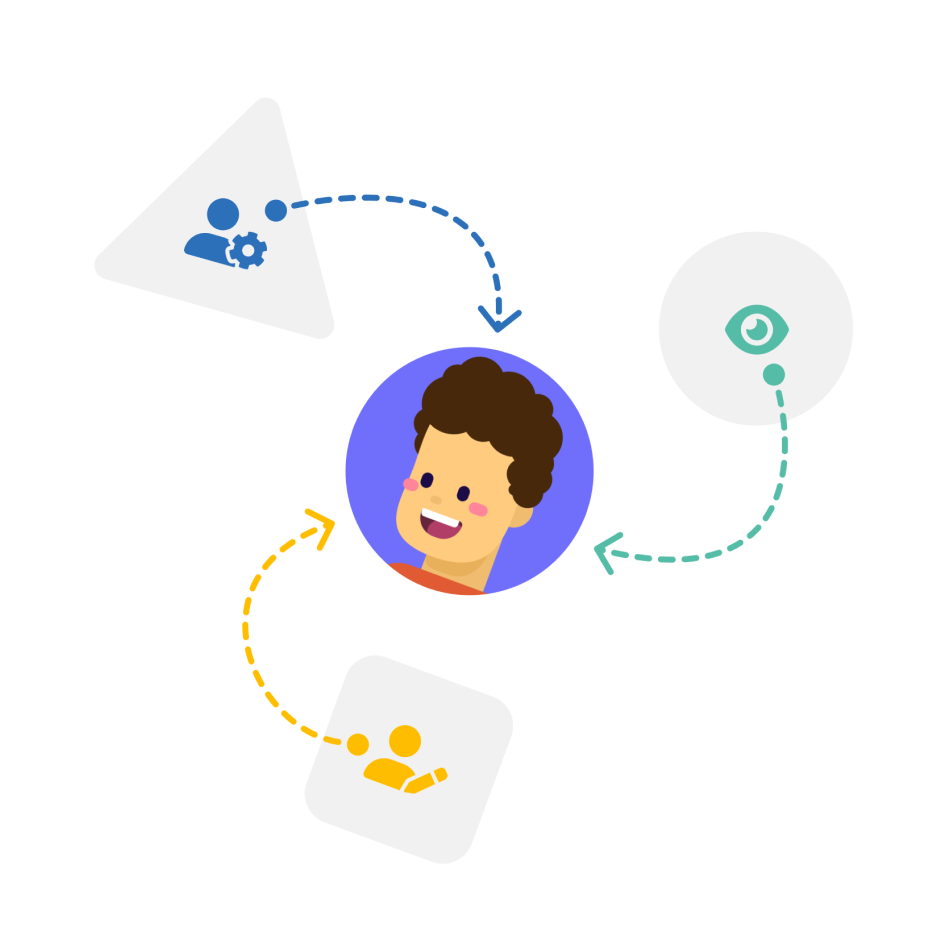
Once you've successfully added a user's email, you can also set a role for the user, thereby controlling access to your folders. You can assign one of these roles to users:
Viewer - can only view bookmarks and sub-folders in the folder that shared by others
Manager - can view and add new bookmarks and sub-folders in the folder
Editor - can view, add and delete, edit bookmarks and sub-folders (but cannot manage/edit the folder itself of course)
-
Step 4:
After you have successfully added the user's email and set his/her role, click on the "Share" button
Share bookmark:
-
Step 1:
Hover your mouse over a bookmark and click on the “Menu” button
-
Step 2:
In the window that opens, enter the email of the user with whom you want to share, and then press the "Enter" button to give them access
-
Step 3:
After you have successfully added the user's email and set, click on the "Share" button
How to create Bookmark Reminders?
Because we have the ability to store an unlimited number of bookmarks, we may forget about some that are important to us. To prevent this, Linker allows you to create reminders for all your important bookmarks in a convenient table.
It only takes a few simple steps to create a reminder:
-
Step 1:
In the sidebar, click on the "Reminders" button, after which the page with the table will open
-
Step 2:
At the top of the table, click on the "Create" button
-
Step 3:
In the window that opens, select the bookmark for which you want to create a reminder. After selecting a bookmark, it will be added to the table
-
Step 4:
The bookmark is added to the table in default settings, however, you have the ability to change these settings. You can change the date and time of the reminder, set the reminder repetition frequency, change the reminder status (Active/Inactive), and delete the reminder
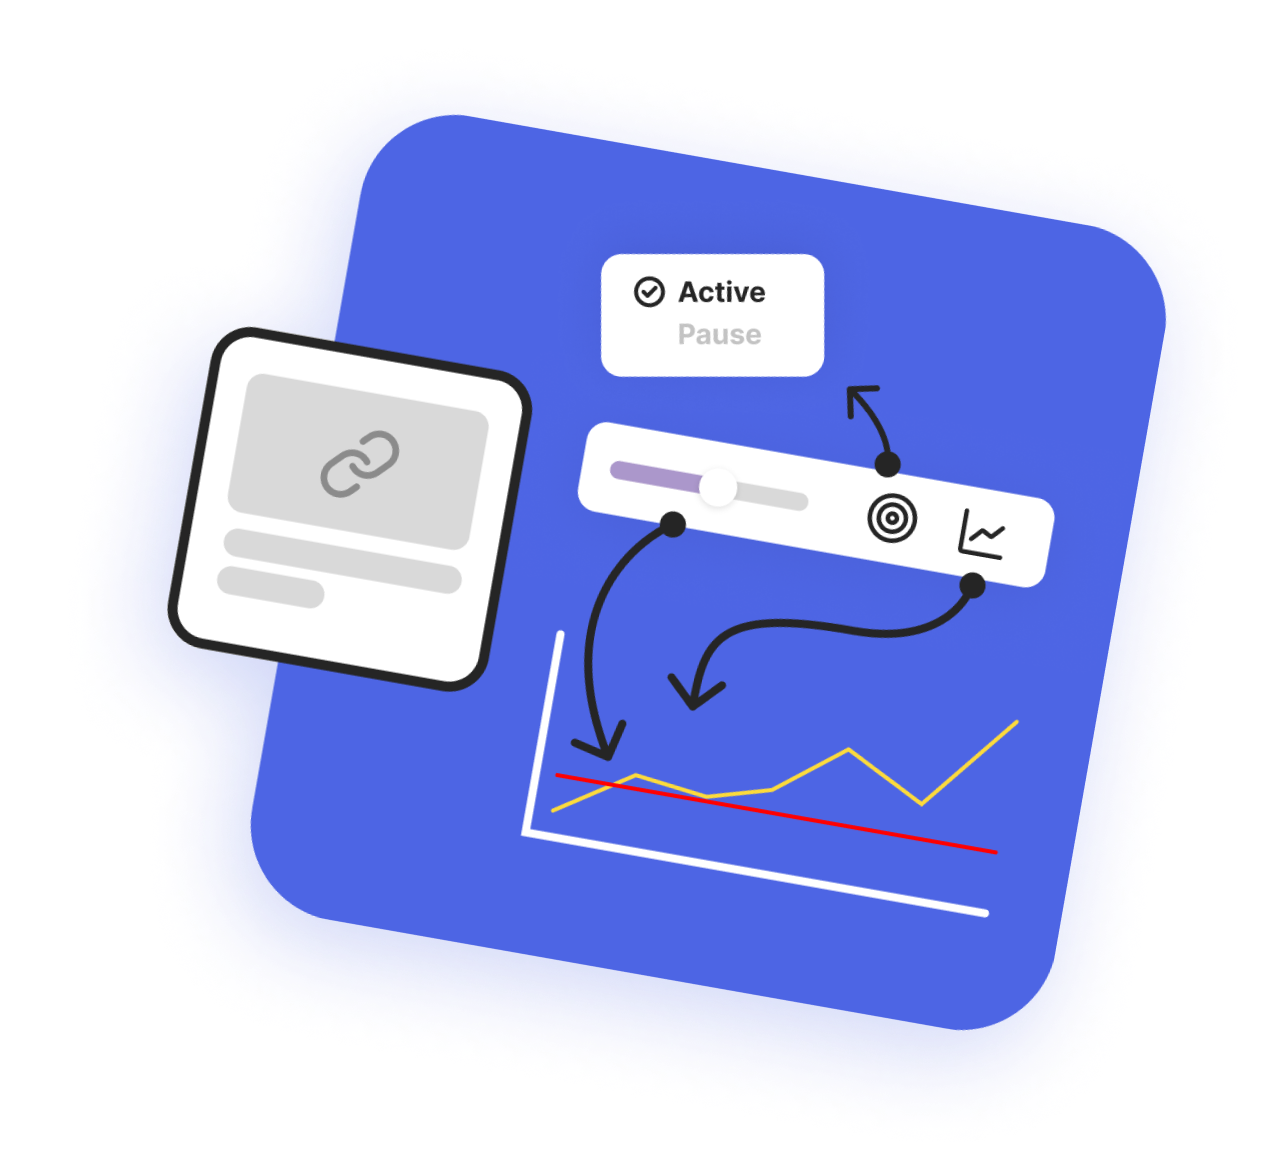
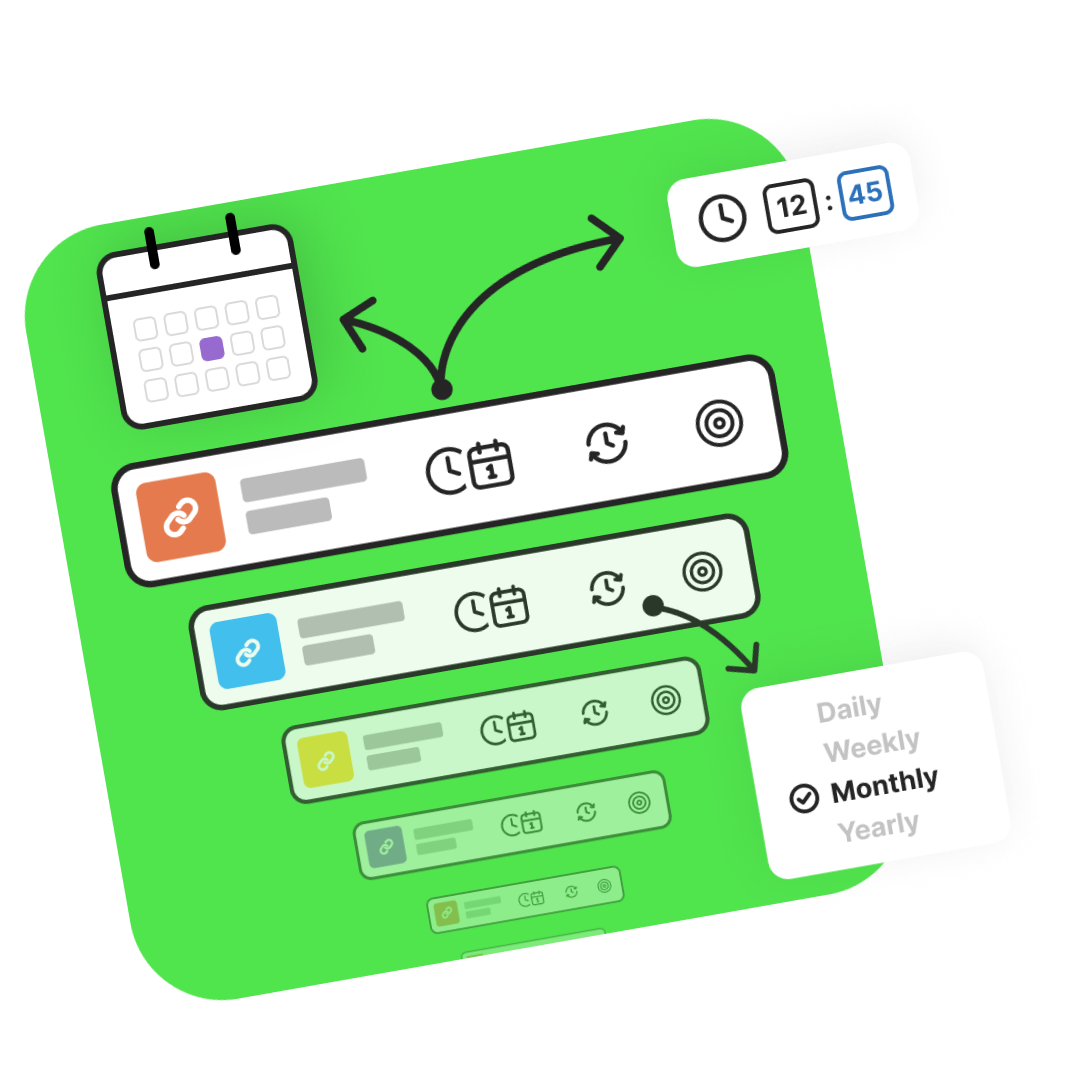
How to create Bookmark Trackers?
With the "bookmark content change tracker," you can trace the source of the bookmark, thereby being aware of all changes within the content (e.g. changes in the article, blog post, etc.). You have the ability to set a threshold for changes in the bookmark source, beyond which you receive a change notification. You also have the opportunity to see all the changes in a beautiful and informative table that shows the periods of changes.
It only takes a few simple steps to create a tracker:
-
Step 1:
In the sidebar, click on the "Tracker" button, after which the page with the table will open
-
Step 2:
At the top of the table, click on the "Add" button
-
Step 3:
In the window that opens, select the bookmark for which you want to create a tracker. After selecting a bookmark, it will be added to the table
-
Step 4:
The bookmark is added to the table in default settings, however, you have the ability to change these settings. You can change the threshold percent, change the tracker status (Active/Inactive) and delete the tracker
-
Step 5:
To see the period of changes in the content of the bookmark source, click on the “Chart” button